Azure login in Github Actions via Service Principal
As it is obvious, deployment is one of the most crucial processes of the software development life cycle (SDLC). As a developer, we are not only responsible for developing software but also for delivering our product on different platforms, such as cloud platforms.
Thanks to IaC or Infrastructure as Code, we can manage, configure, and provision resources on cloud platforms through code rather than time-consuming and error-prone manual processes.
In this blog, I will show you how to make a connection between GitHub Actions and Azure Cloud with which we can deploy resources on Azure. Although, the latter part is not covered this time because it makes the blog very long and less efficient.
The GitHub repository for this blog is available here.
This post is already published on the Techspire Co blog.
Table of contents:
Service Principal
Simply put, the Service Principal is nothing more than a security identifier that is used by applications, services, or other clients that want to access an existing resource or create one on Azure.
The whole story is like this; an Azure administrator would create a Service Principal and assign it a secret key(application key) and a set of permissions(role assignment), then clients can use these credentials to access resources on Azure.
Create a Service Principal
Creating a Service Principal is pretty simple. You can choose either Azure CLI or Azure Portal. I go with Azure CLI because it is way easier than Azure Portal.
But first, we need to create a resource group:
- Navigate to the Azure Portal home page, click on the hamburger menu, and select Resource groups. If it does not exist there, you can search for it in the search bar.
- From the top of the resource group table, click +Create. The Create a resource group appears.
- Type a resource group name, for example: sampleResourceGroup.
- Click Review + create.
- Click Create.
It is time to create a service principal, but before using Azure CLI commands, sign in with az login.
Then, you can easily create a service principal and configure its access to Azure resources using the below command.
To install Azure CLI on your local machine, go here.
# Create a service principal for a resource group using a preferred name and role
az ad sp create-for-rbac --name "sampleServicePrincipal" \
--role contributor \
--scopes /{subscription-id}/subscriptionID/resourceGroups/sampleResourceGroup \
--sdk-auth
The preceding command has three parameters:
--name: It is the name of the service principal. If you do not specify this, the default value would be a name containing a time stamp. (e.g.azure-cli-%Y-%m-%d-%H-%M-%S)--role: It is the role of the service principal, such as thereaderorcontributor, etc. We discuss the role down here.--scopes: It narrows the scope to a resource or resource group. We discuss the scope down here.{subscription-id}: Do not forget to replace your actual Azure subscription id.
The az ad sp create-for-rbac output is a JSON that includes credentials the client needs to get a token from Azure so that you must protect. It would be like below:
{
"clientId": "<GUID>",
"clientSecret": "<GUID>",
"subscriptionId": "<GUID>",
"tenantId": "<GUID>",
(...)
}
Role and Scope
In our case, I assigned the Contributor role to the service principal at a resource group level(scope). Be aware that you should assign proper roles at proper scopes based on your needs, and avoid broader roles at broader scopes.
When you assign a role at a scope, the client with that role can access all resources that exist under a specified scope. In our example, the client with a Contributor role can access resources in the sampleResourceGroup resource group.
To learn more about assigning an Azure role, you can read this blog.
Client secret
If you look at the az ad sp create-for-rbac output, there is a client secret already generated for you. The client secret is a key that clients use to prove their identity when requesting a token. In our case, Github sends the secret to Azure to get a token with which, Github can deploy resources on Azure.
Now, you can navigate to the Azure portal, and find your service principal. From the left panel, click Cerificates & secrets, then the Client secrets tab; you will be able to see a record in the client secrets table like below:

Awesome! We are done with the Azure part; let's do the Github stuff.
Add credentials to GitHub
We want to add the azure credentials to our GitHub project to be able to login to Azure. I have already created a new project on GitHub for the demo purpose. The project is pretty fresh, so let's add what we needed to it.
First, I am going to add Azure credentials to my repository secrets. Secrets are encrypted and are used for sensitive data. Be aware that those people who have collaborator access to your repository can use secrets for actions.
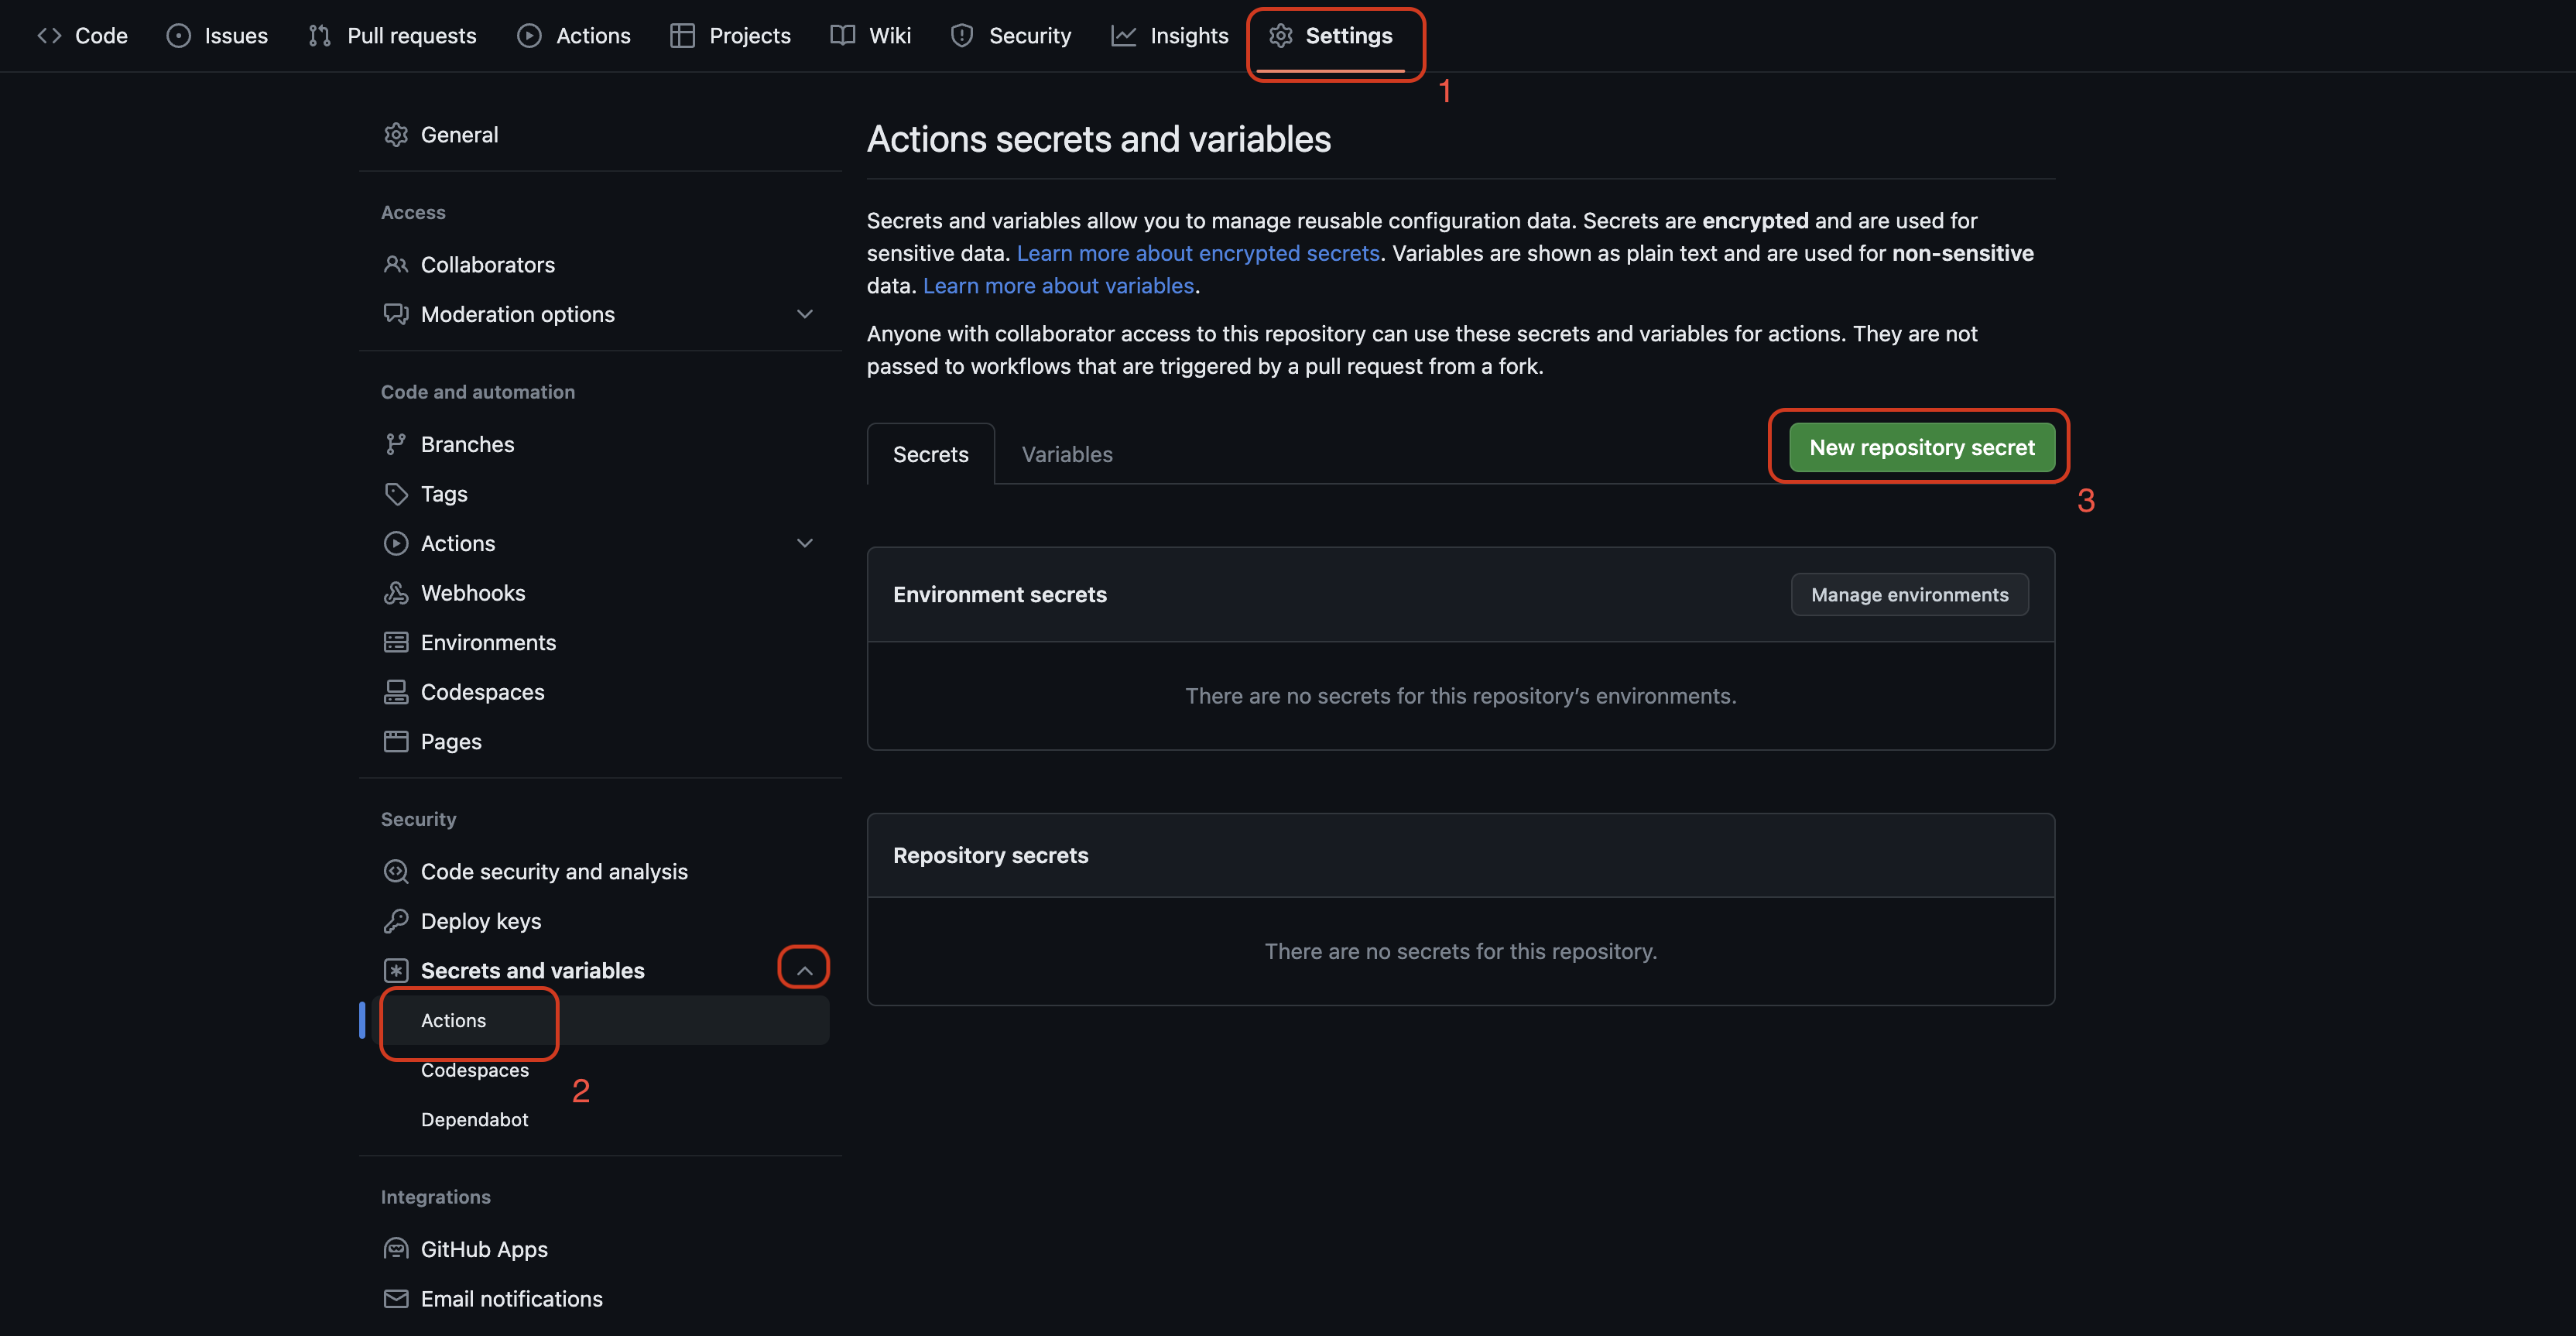
Navigate to your project on GitHub.
Click Settings from the left panel.
Expand the Secrets and variables.
Click Actions.
Click New repository secret.
Give a meaningful name to your secret. We will use this name in the workflow. I used
AZURE_CREDENTIALS. Then copy the output of theaz ad sp create-for-rbaccommand and paste it in the Secret input box.Click Add secret.
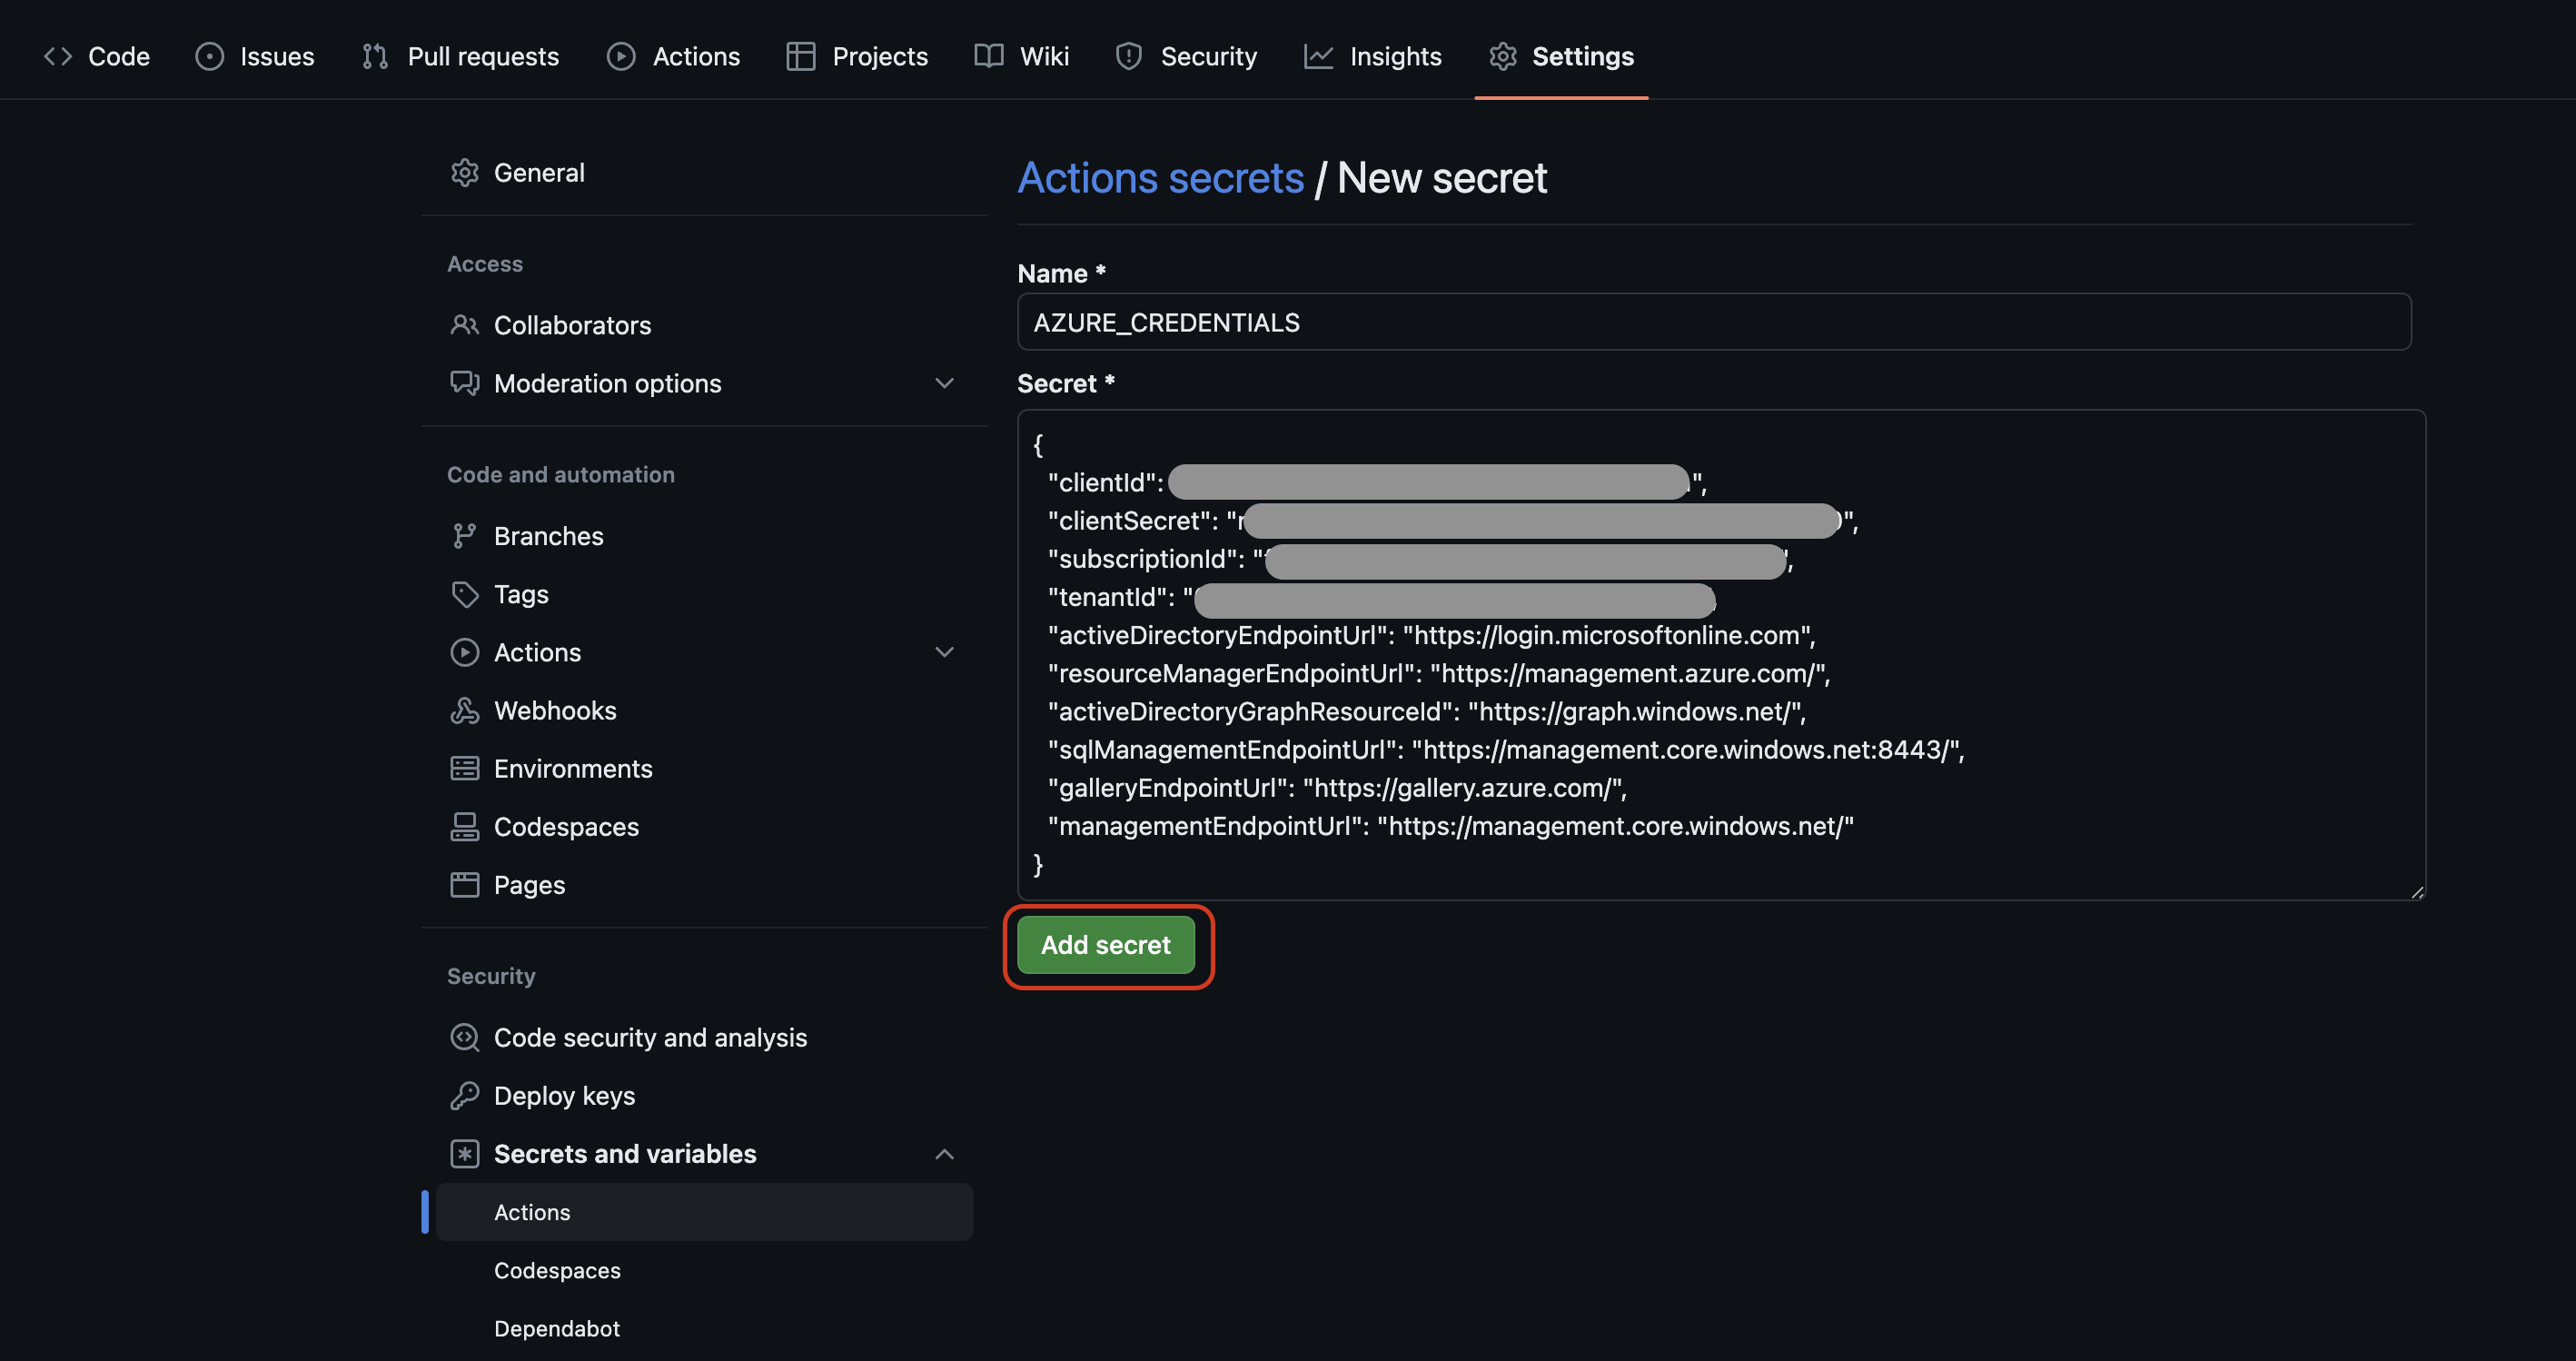
Bear in mind that after adding the secret you are no longer able to reveal the secret value although the only possible action is editing.
Now, it is time to add an action to your repository but before that let's review GitHub actions and workflows.
Github Actions and Workflow
GitHub Actions is a platform with which you can automatically build, test, and deploy your projects on GitHub.
Also, it's a convenient way to create workflows in your repository. Workflow is nothing more than a bunch of jobs and steps that are supposed to run when a specific activity on GitHub happens or is triggered manually.
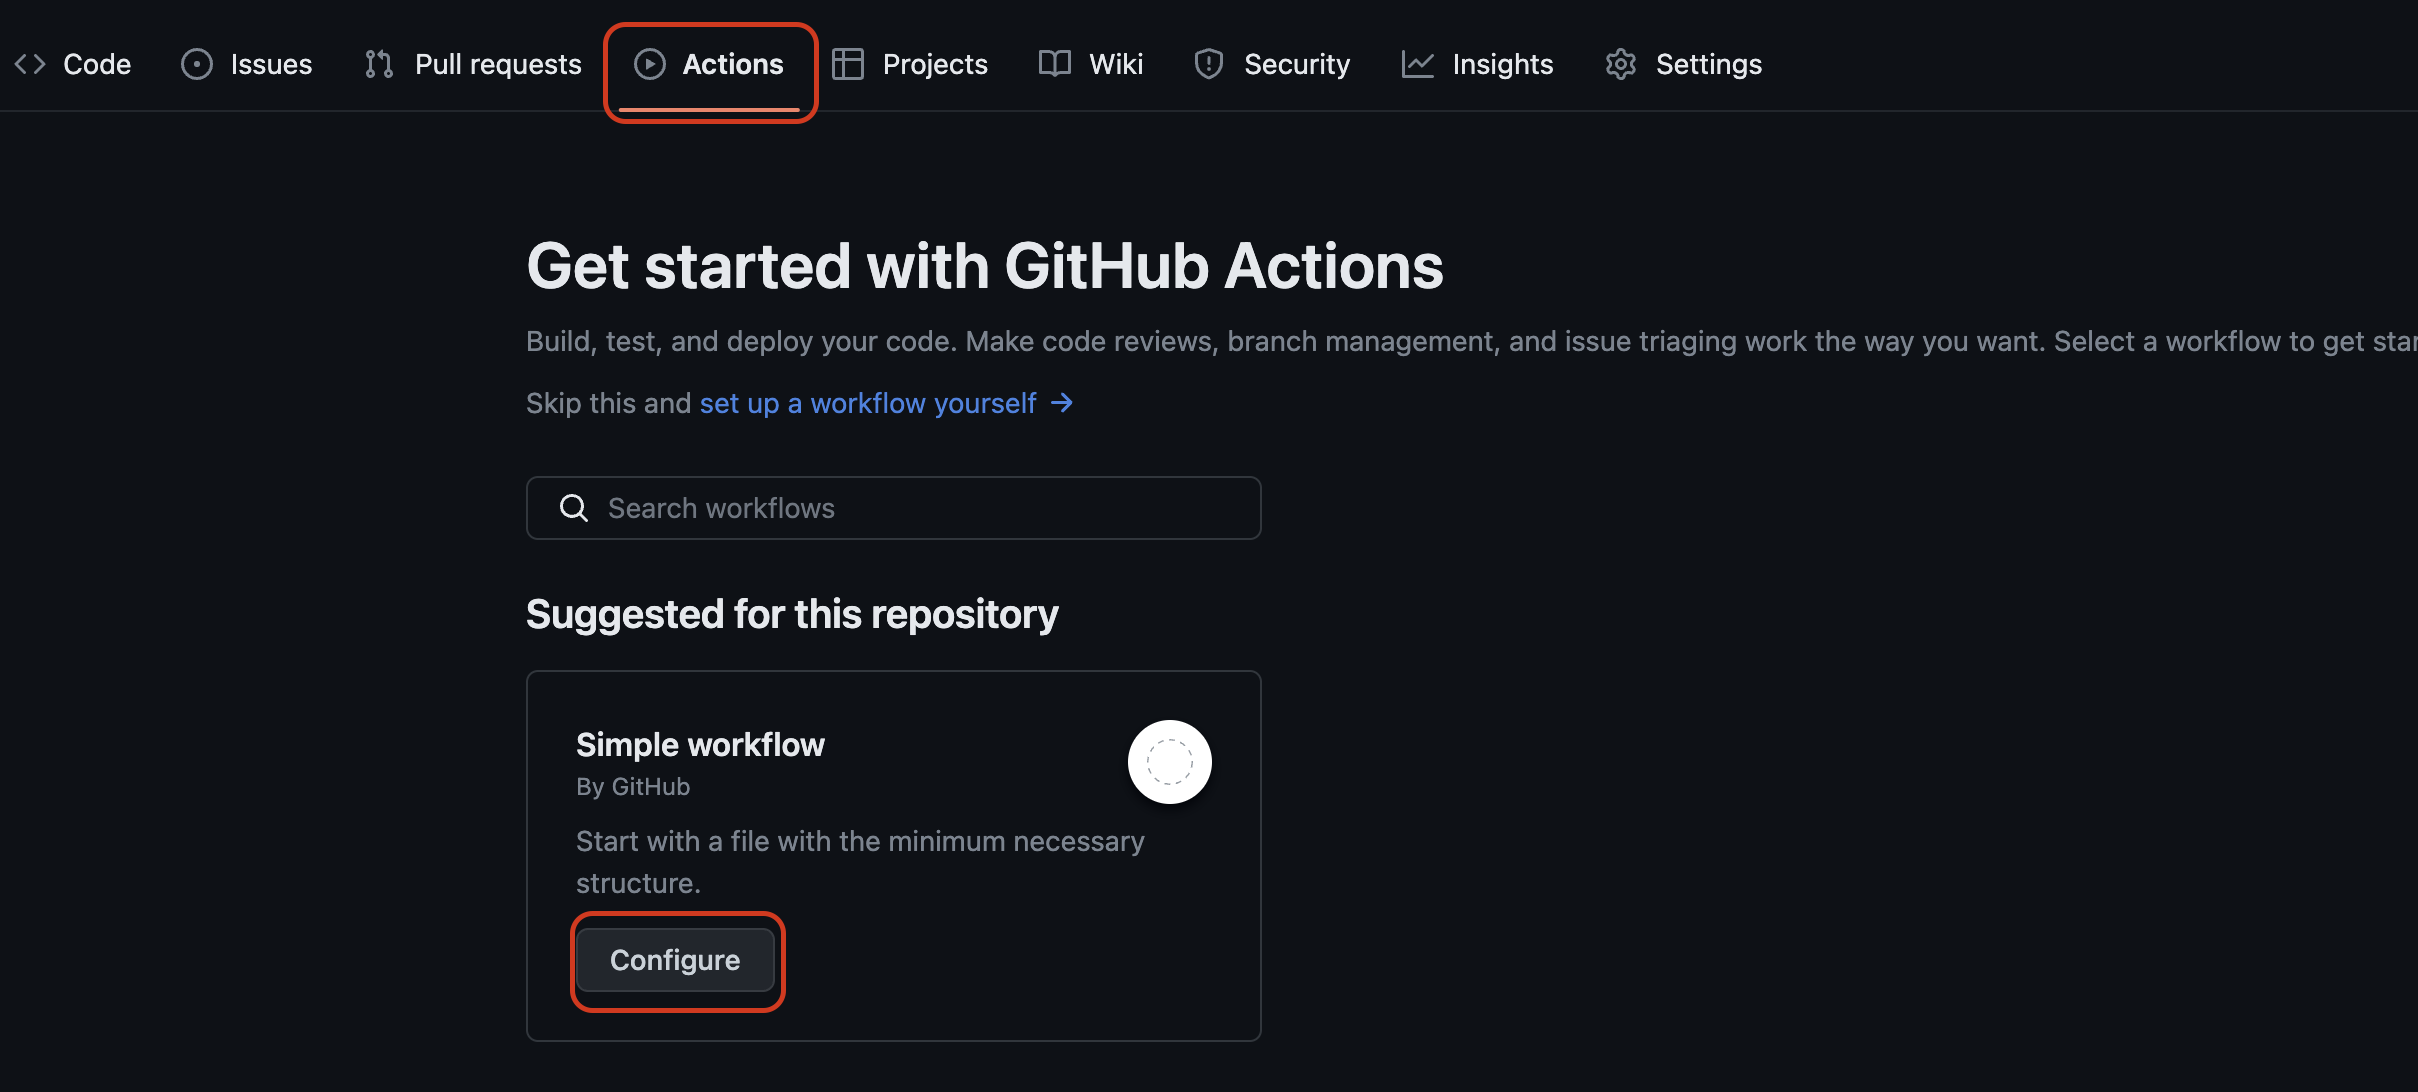
To add an action to your project:
- Click Actions tab and under the Suggested for this repository, find the Simple workflow box; click Configure to add a simple workflow to your project.
- Give a name to the workflow file name. I used
azurelogindeploy.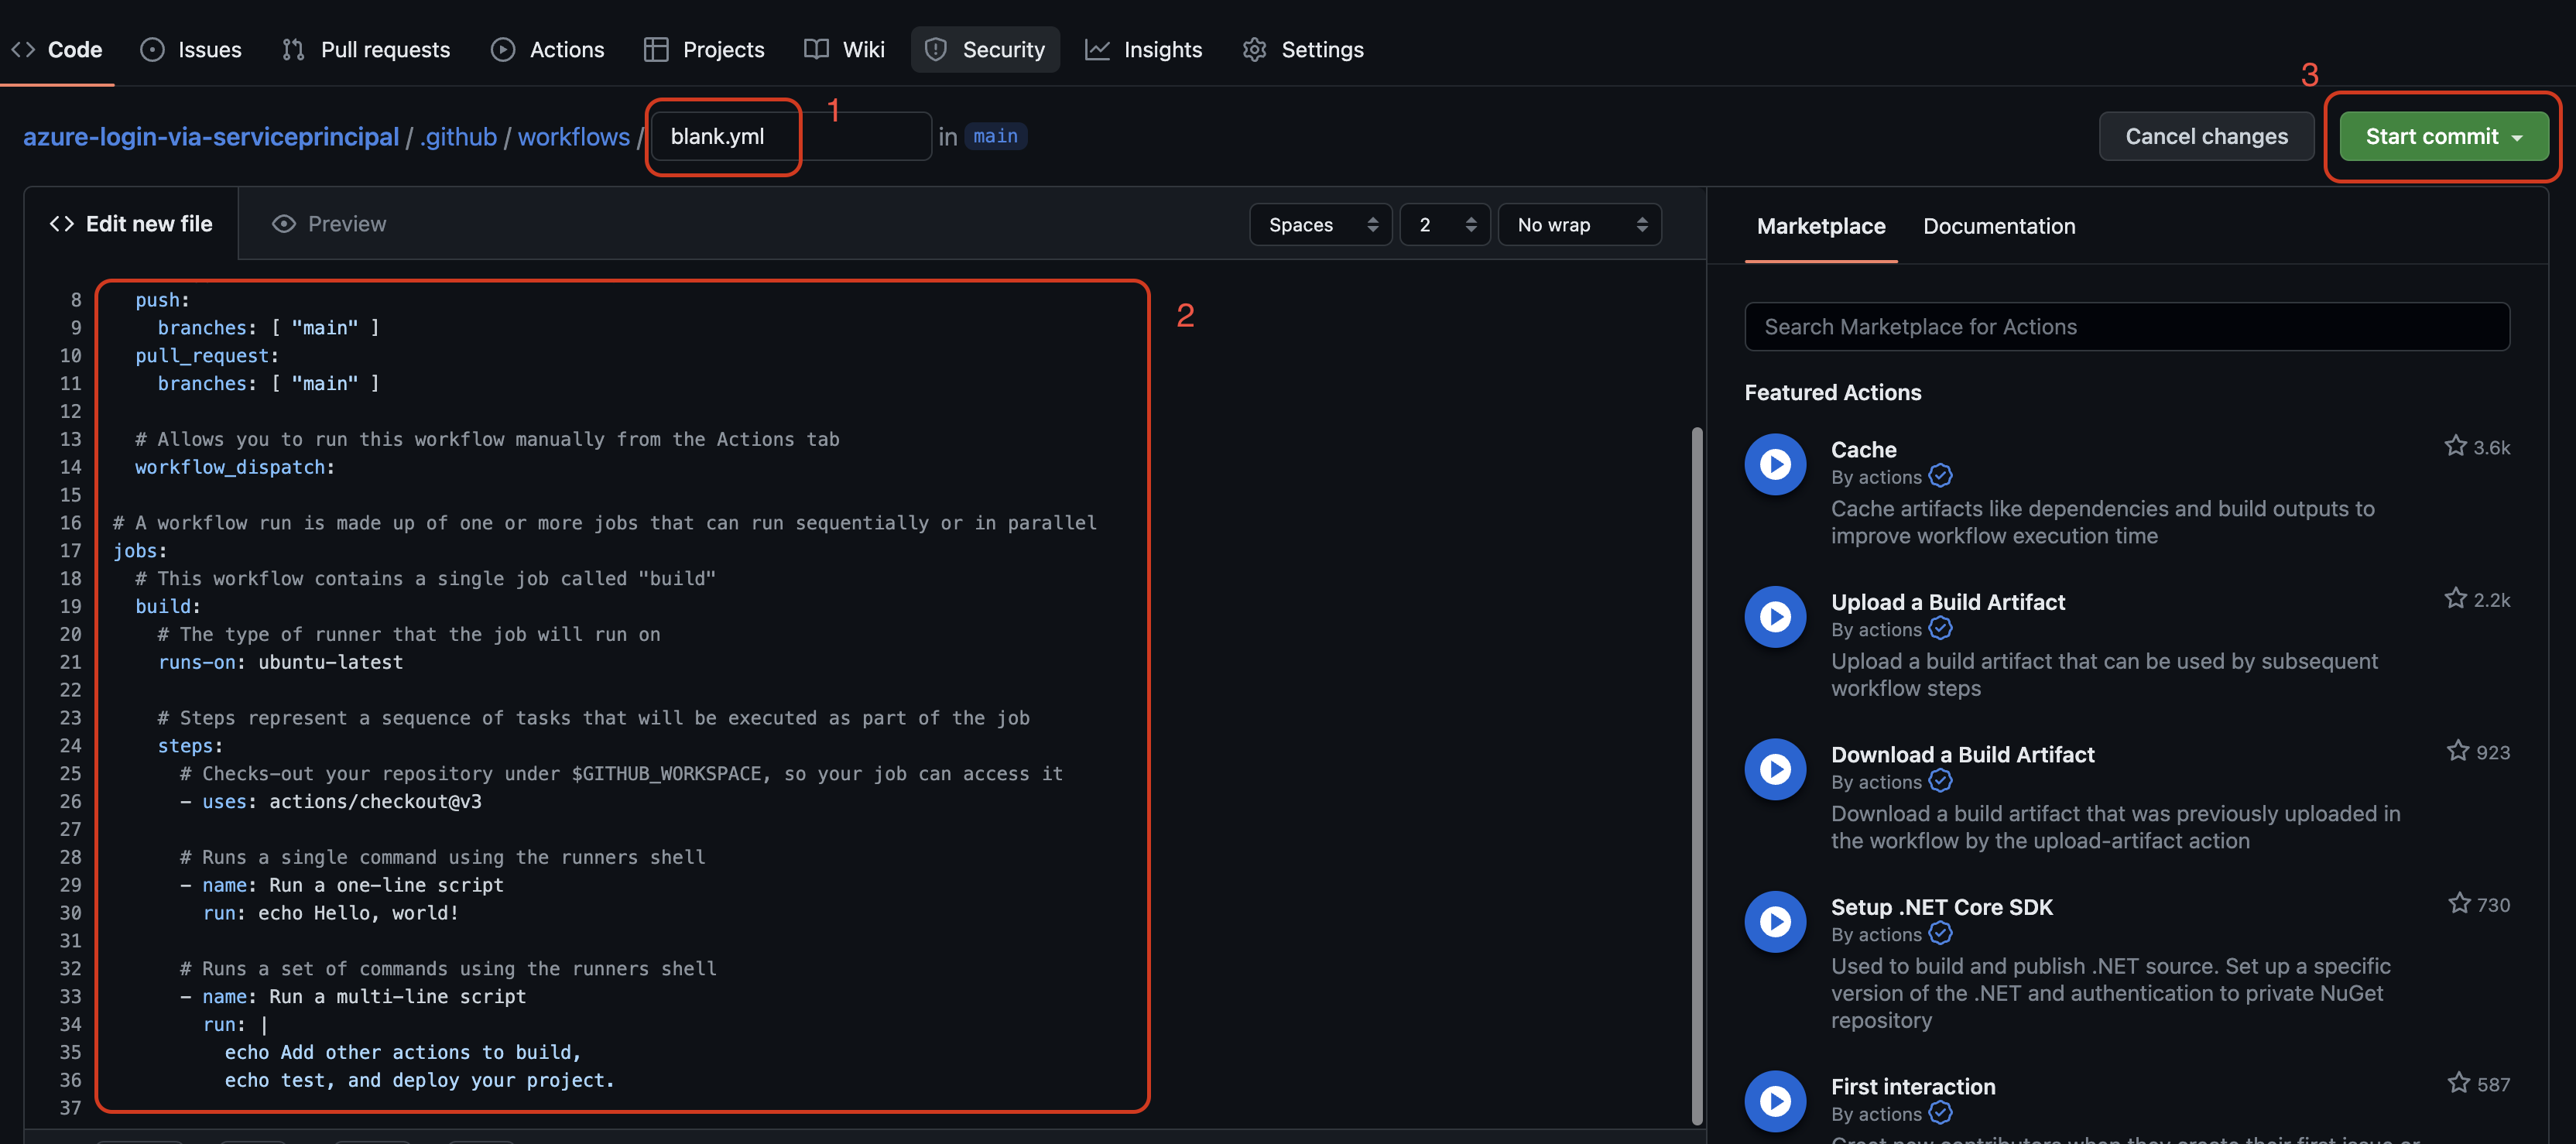
- Replace the content of the workflow file with the below one then click Start commit. Add a comment for the commit and click Commit new file.
name: "Azure Login Workflow"

on:
push:
branches:
- main

jobs:
azureLogin:
runs-on: ubuntu-latest

steps:
- name: Azure Login
uses: Azure/login@v1
with:
creds: ${{secrets.AZURE_CREDENTIALS}}
name: specified the name of the workflow.on: specified events that cause the workflow to run. In our case, when a push action happens on the main branch, the workflow will be triggered. As a result, as soon as we commit the new workflow file in step 3, the action starts running.jobs: a workflow comprises one or morejobs. You can useruns-onto define the type of machine to run the job on.steps: A job contains a sequence of tasks calledsteps. Inside a step, you can select an action to run as a part of a step in your job viauses. Some actions require inputs that you must set using thewith.
In order to login to Azure, I used Azure/Login@v1 action and provided the creds input with secrets.AZURE_CREDENTIALS which we already defined in the secrets of the repository.
To learn more about workflow syntax, you can read here.
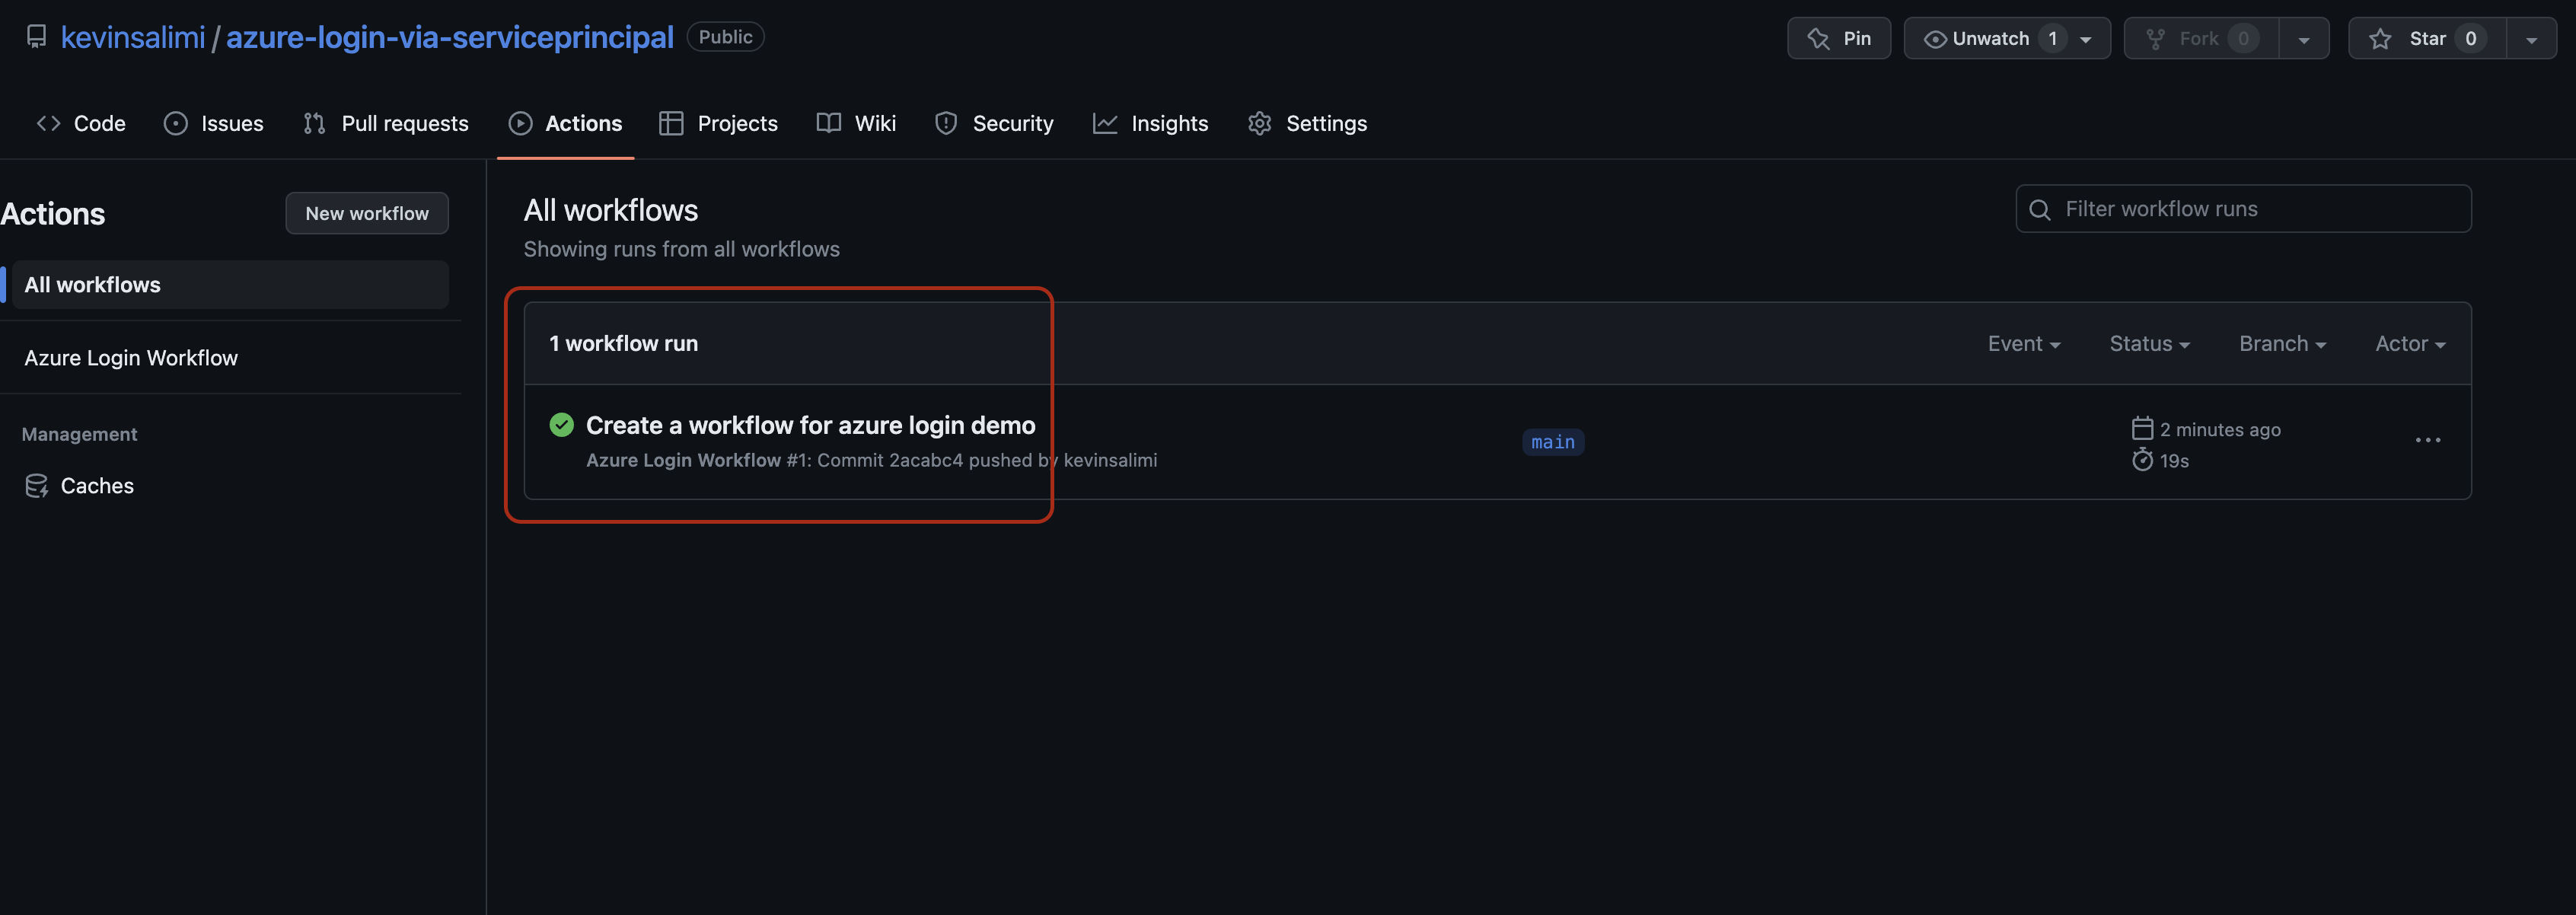
Let's check out the workflow run by navigating to the Actions tab in your repository. As you can see in the below photo, the workflow runs successfully and is able to login to Azure. You can also visit the workflow runs here.
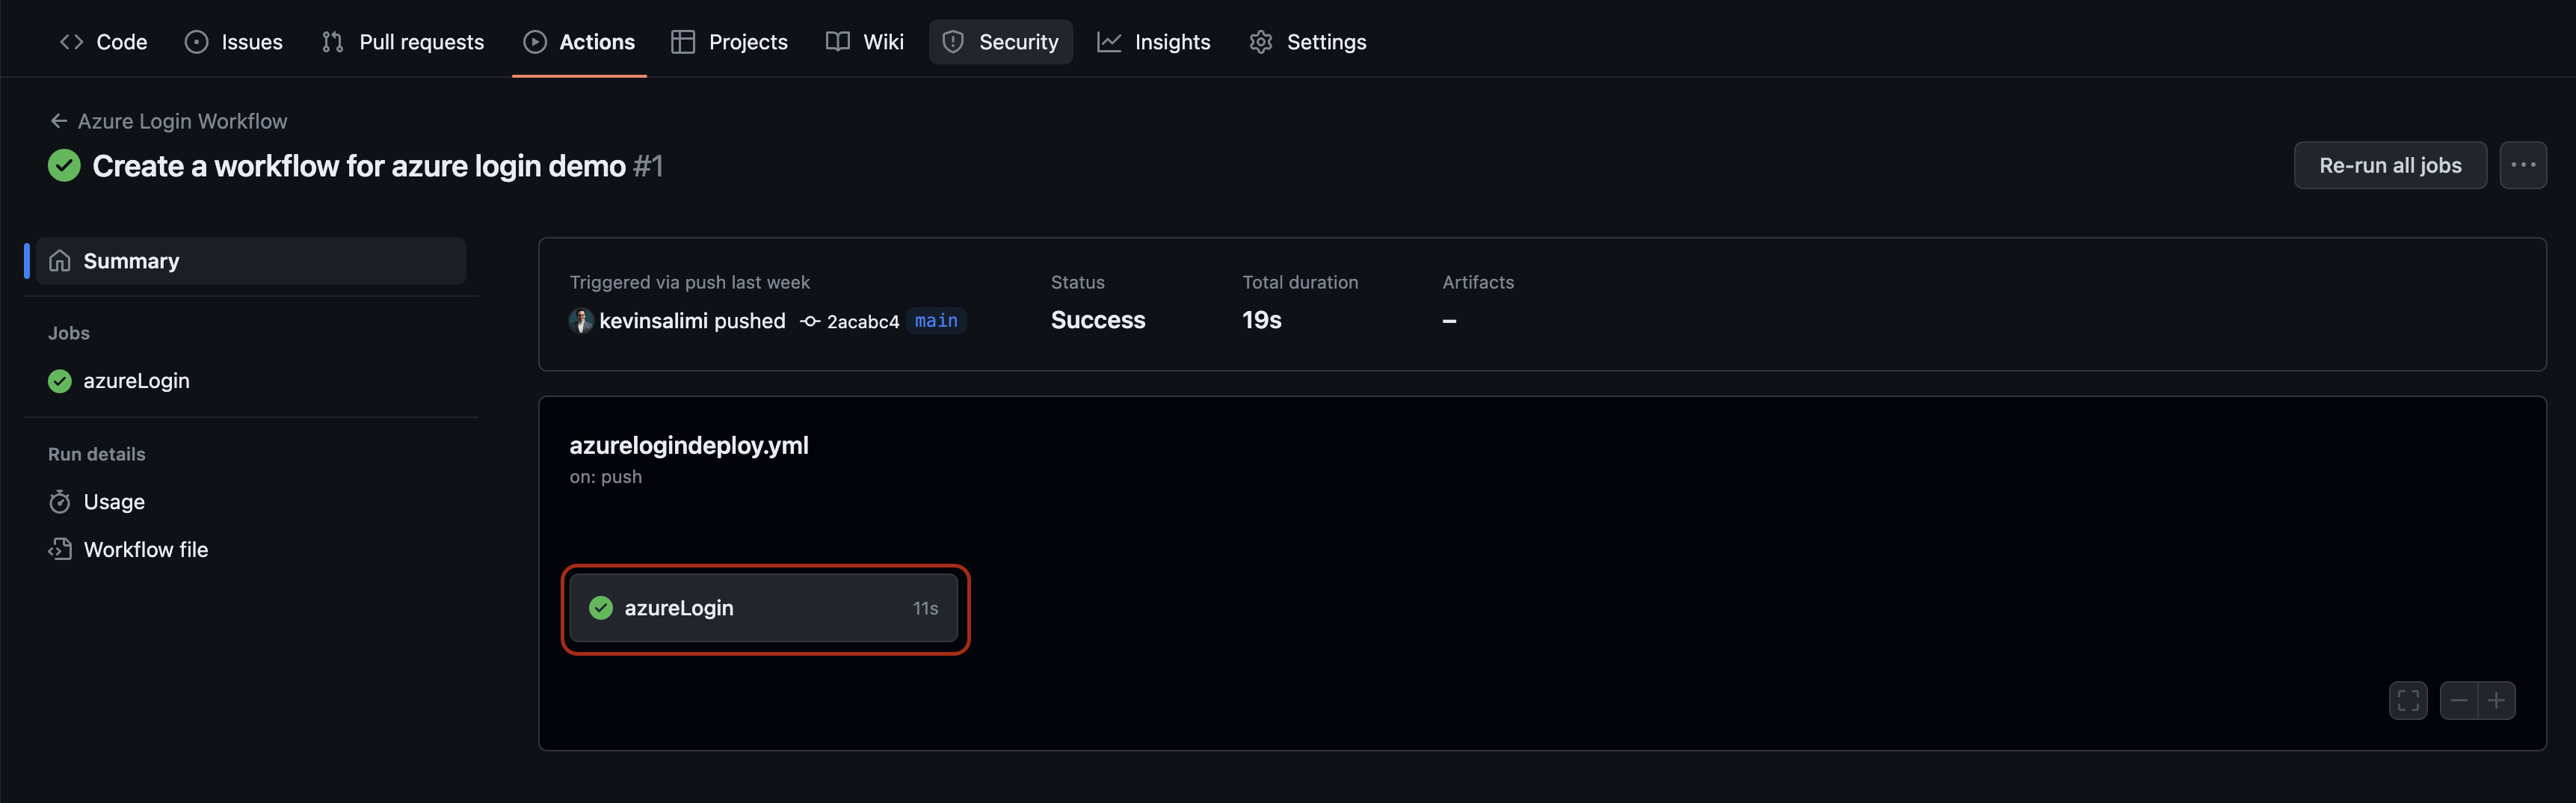
 Click on the run action then go through the job detail by clicking on
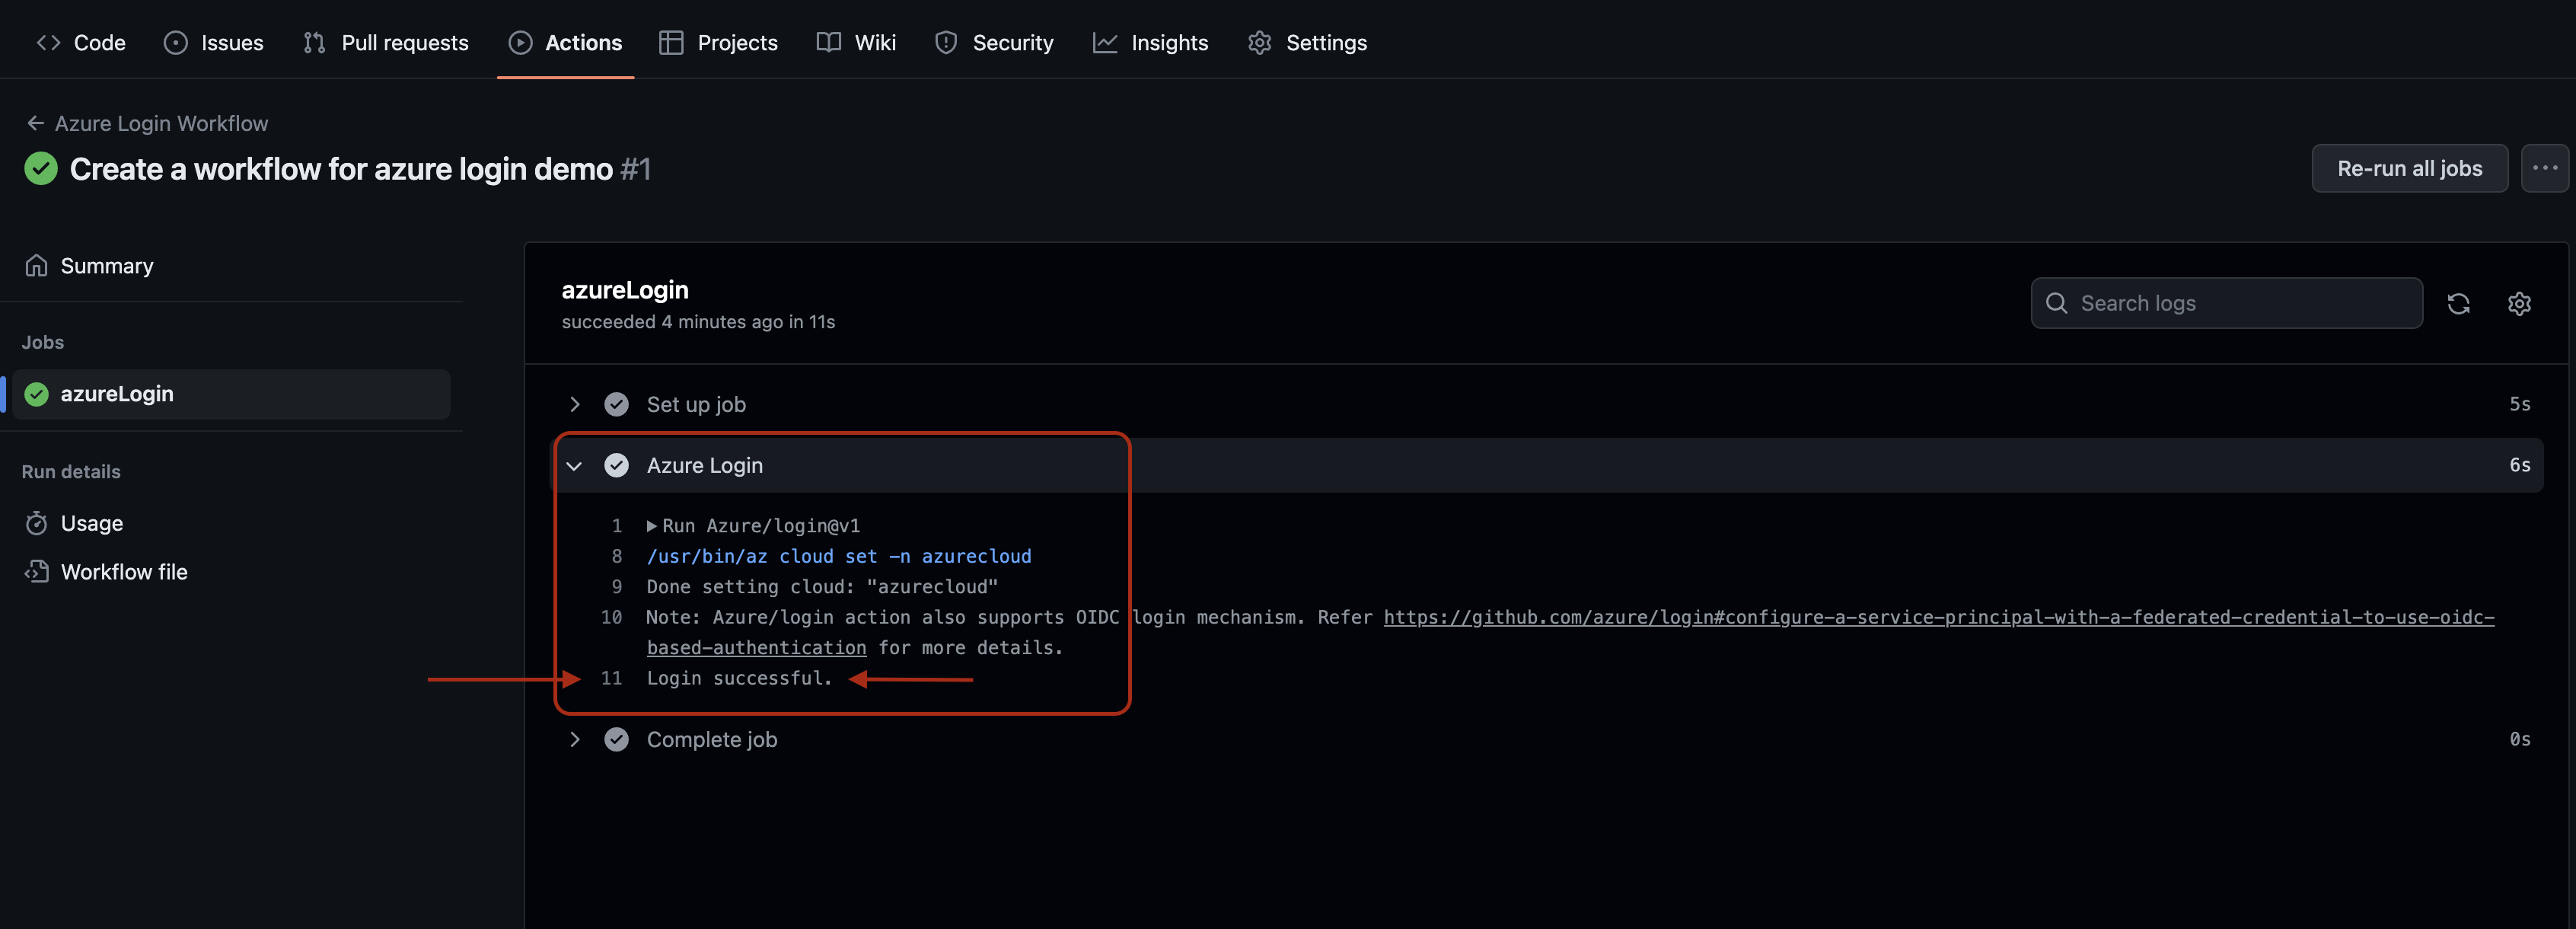
 azureLogin job. Expand the Azure Login step to see its detail.
Conclusion
In this blog, I showed you how we can login to Azure from GitHub actions. We made a service principal using Azure CLI, then added its credentials to GitHub actions. Besides, looked over a workflow file in a repository, plus scopes and roles of service principals.